Using collection views has been possible since version 1.0, but with version 1.2.3 there has been an important node upgrade which makes them a lot more useful – asynchronous image download, caching and automatic thumbnail generation in the node “Image for url”.
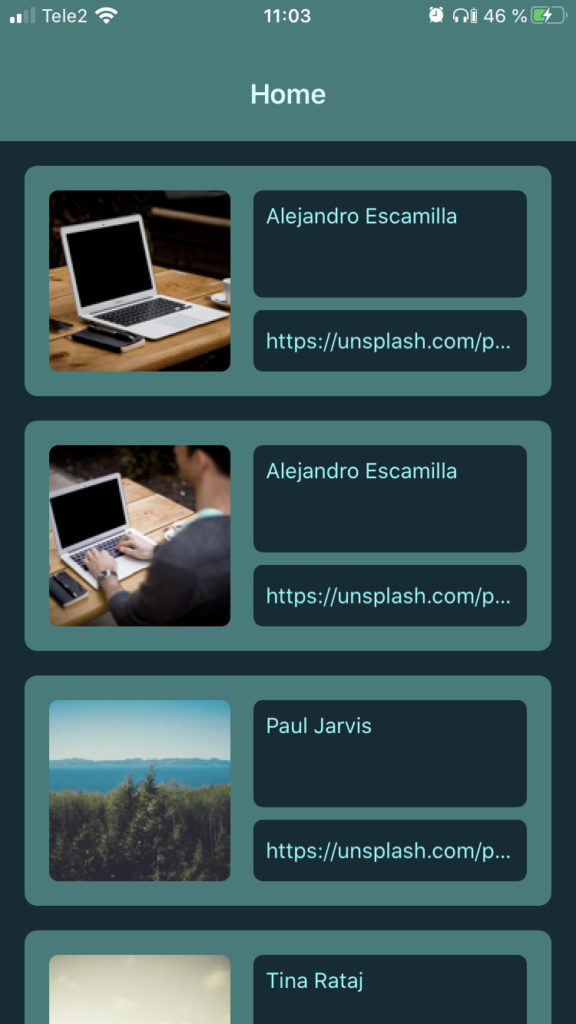
Collection views are created using the node “Collection View” where you select the datasource (array) and a template (view). The template should contain sub views with names matching the keys inside the dictionary object in your datasource array.
In the following example, we are performing a GET request to fetch a JSON datasource from Picsum Photos with the following structure:
[
    {
        "id": "0",
        "author": "Alejandro Escamilla",
        "width": 5616,
        "height": 3744,
        "url": "https://unsplash.com/...",
        "download_url": "https://picsum.photos/..."
    }
]
Each entry contains a dictionary with several keys and values. We are interested in “author”, “url” and of course – “download_url” which is the actual URL of the image.
View setup
So we begin our project by creating the view setup as follows:
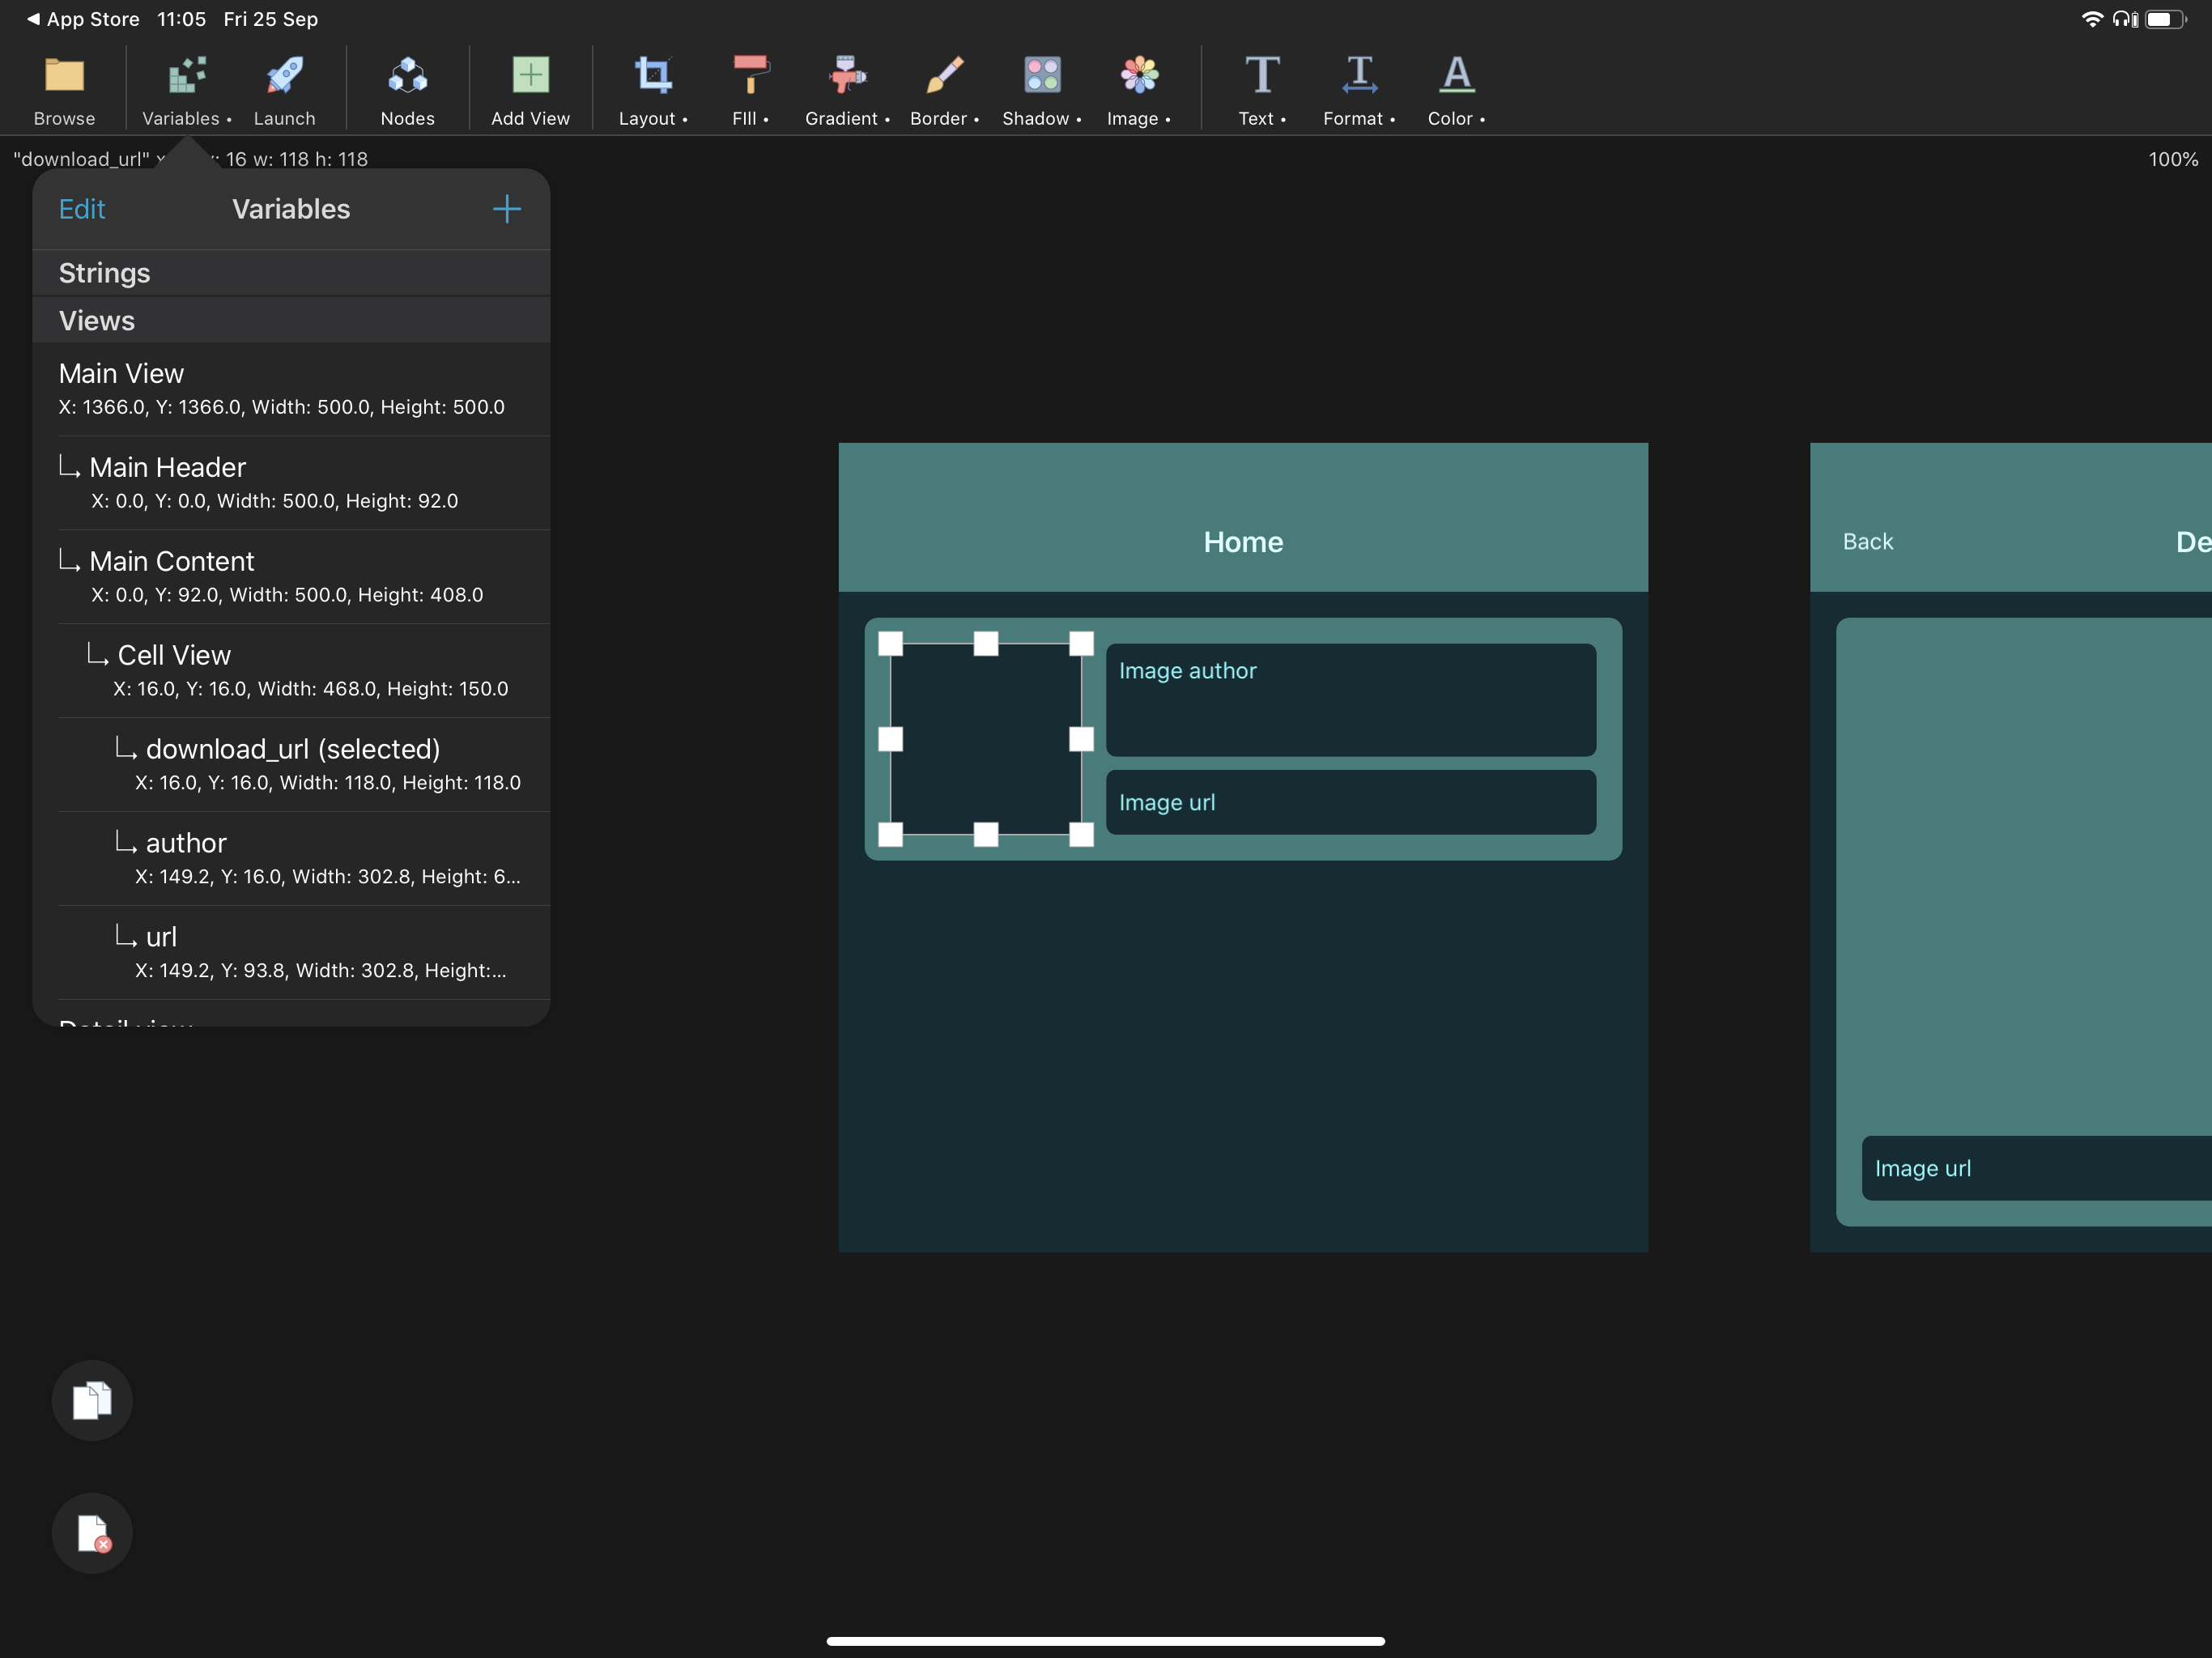

That’s it for the views. Data from the dictionary will be automatically assigned to the views with names matching the keys.
Node tree
Depending on what you want to achieve with your setup, the node tree will look a lot different. The following tree might look complicated at first glance, but there are usually 4 parts when working with collection views:
- Fetching the data source
- Adding the collection view to an existing container view
- Asynchronous image download and caching (new)
- Performing an action when the user selects an item
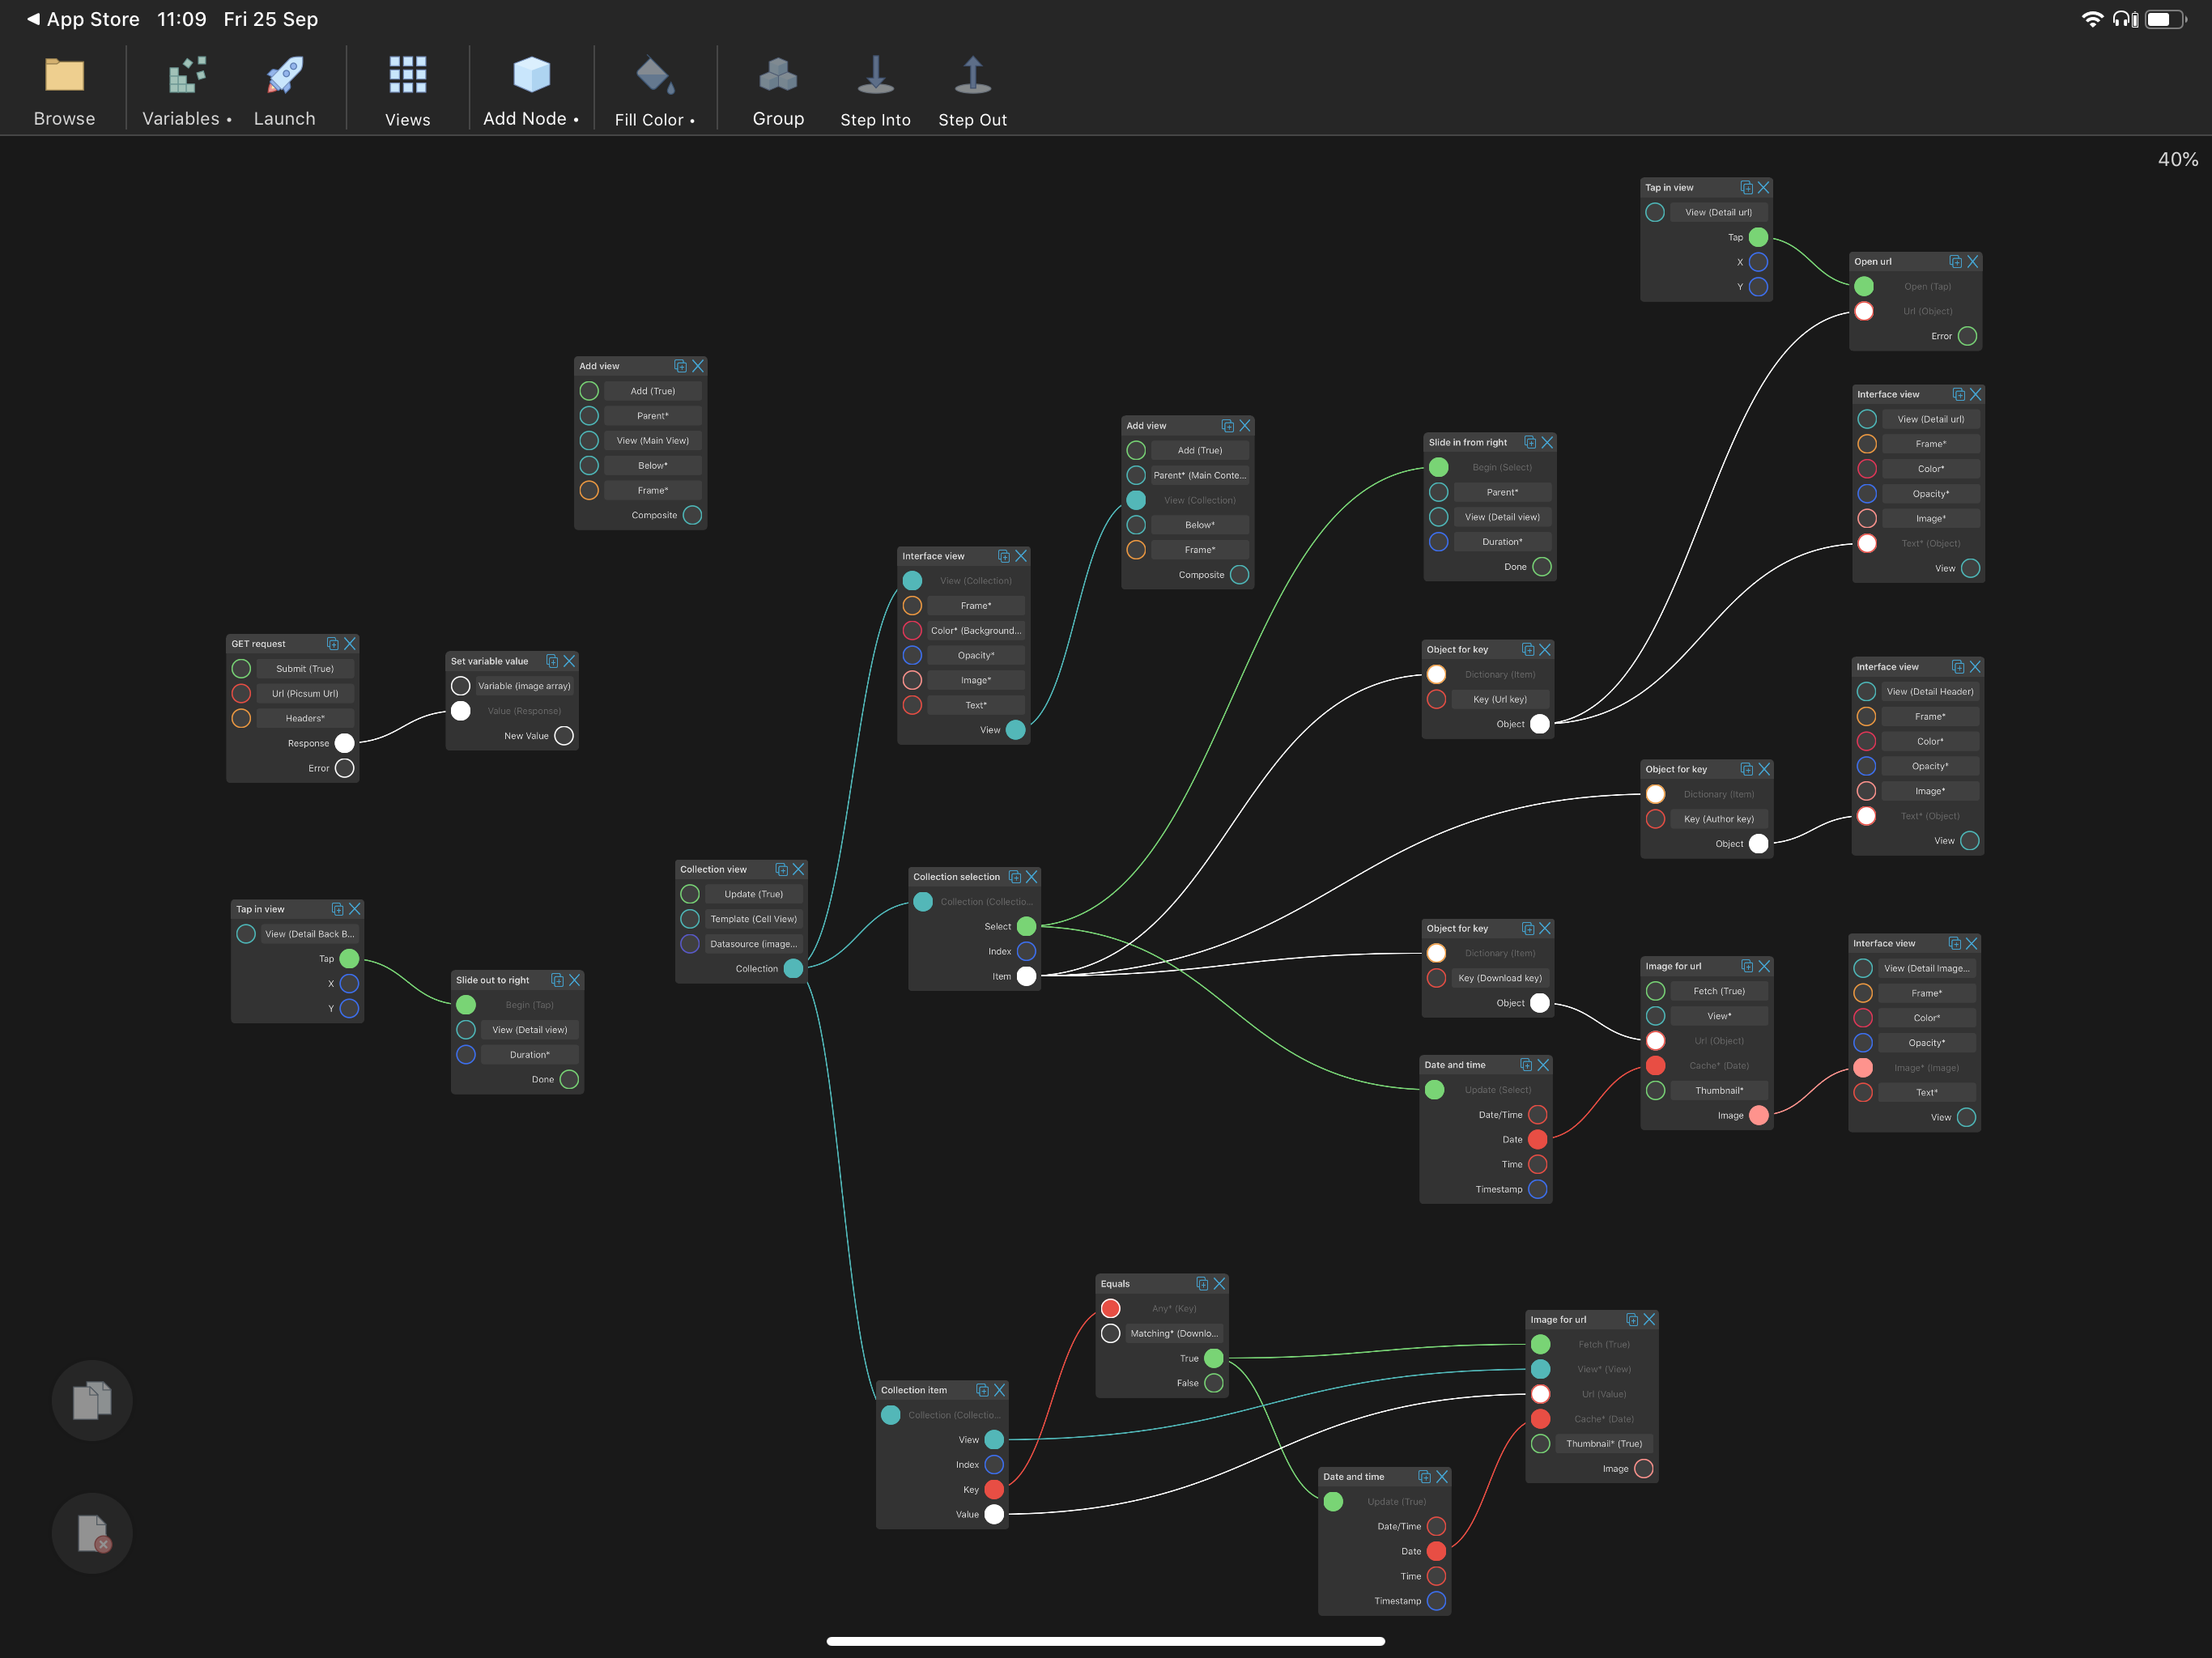
Looking at each part, let’s start with fetching the data source:
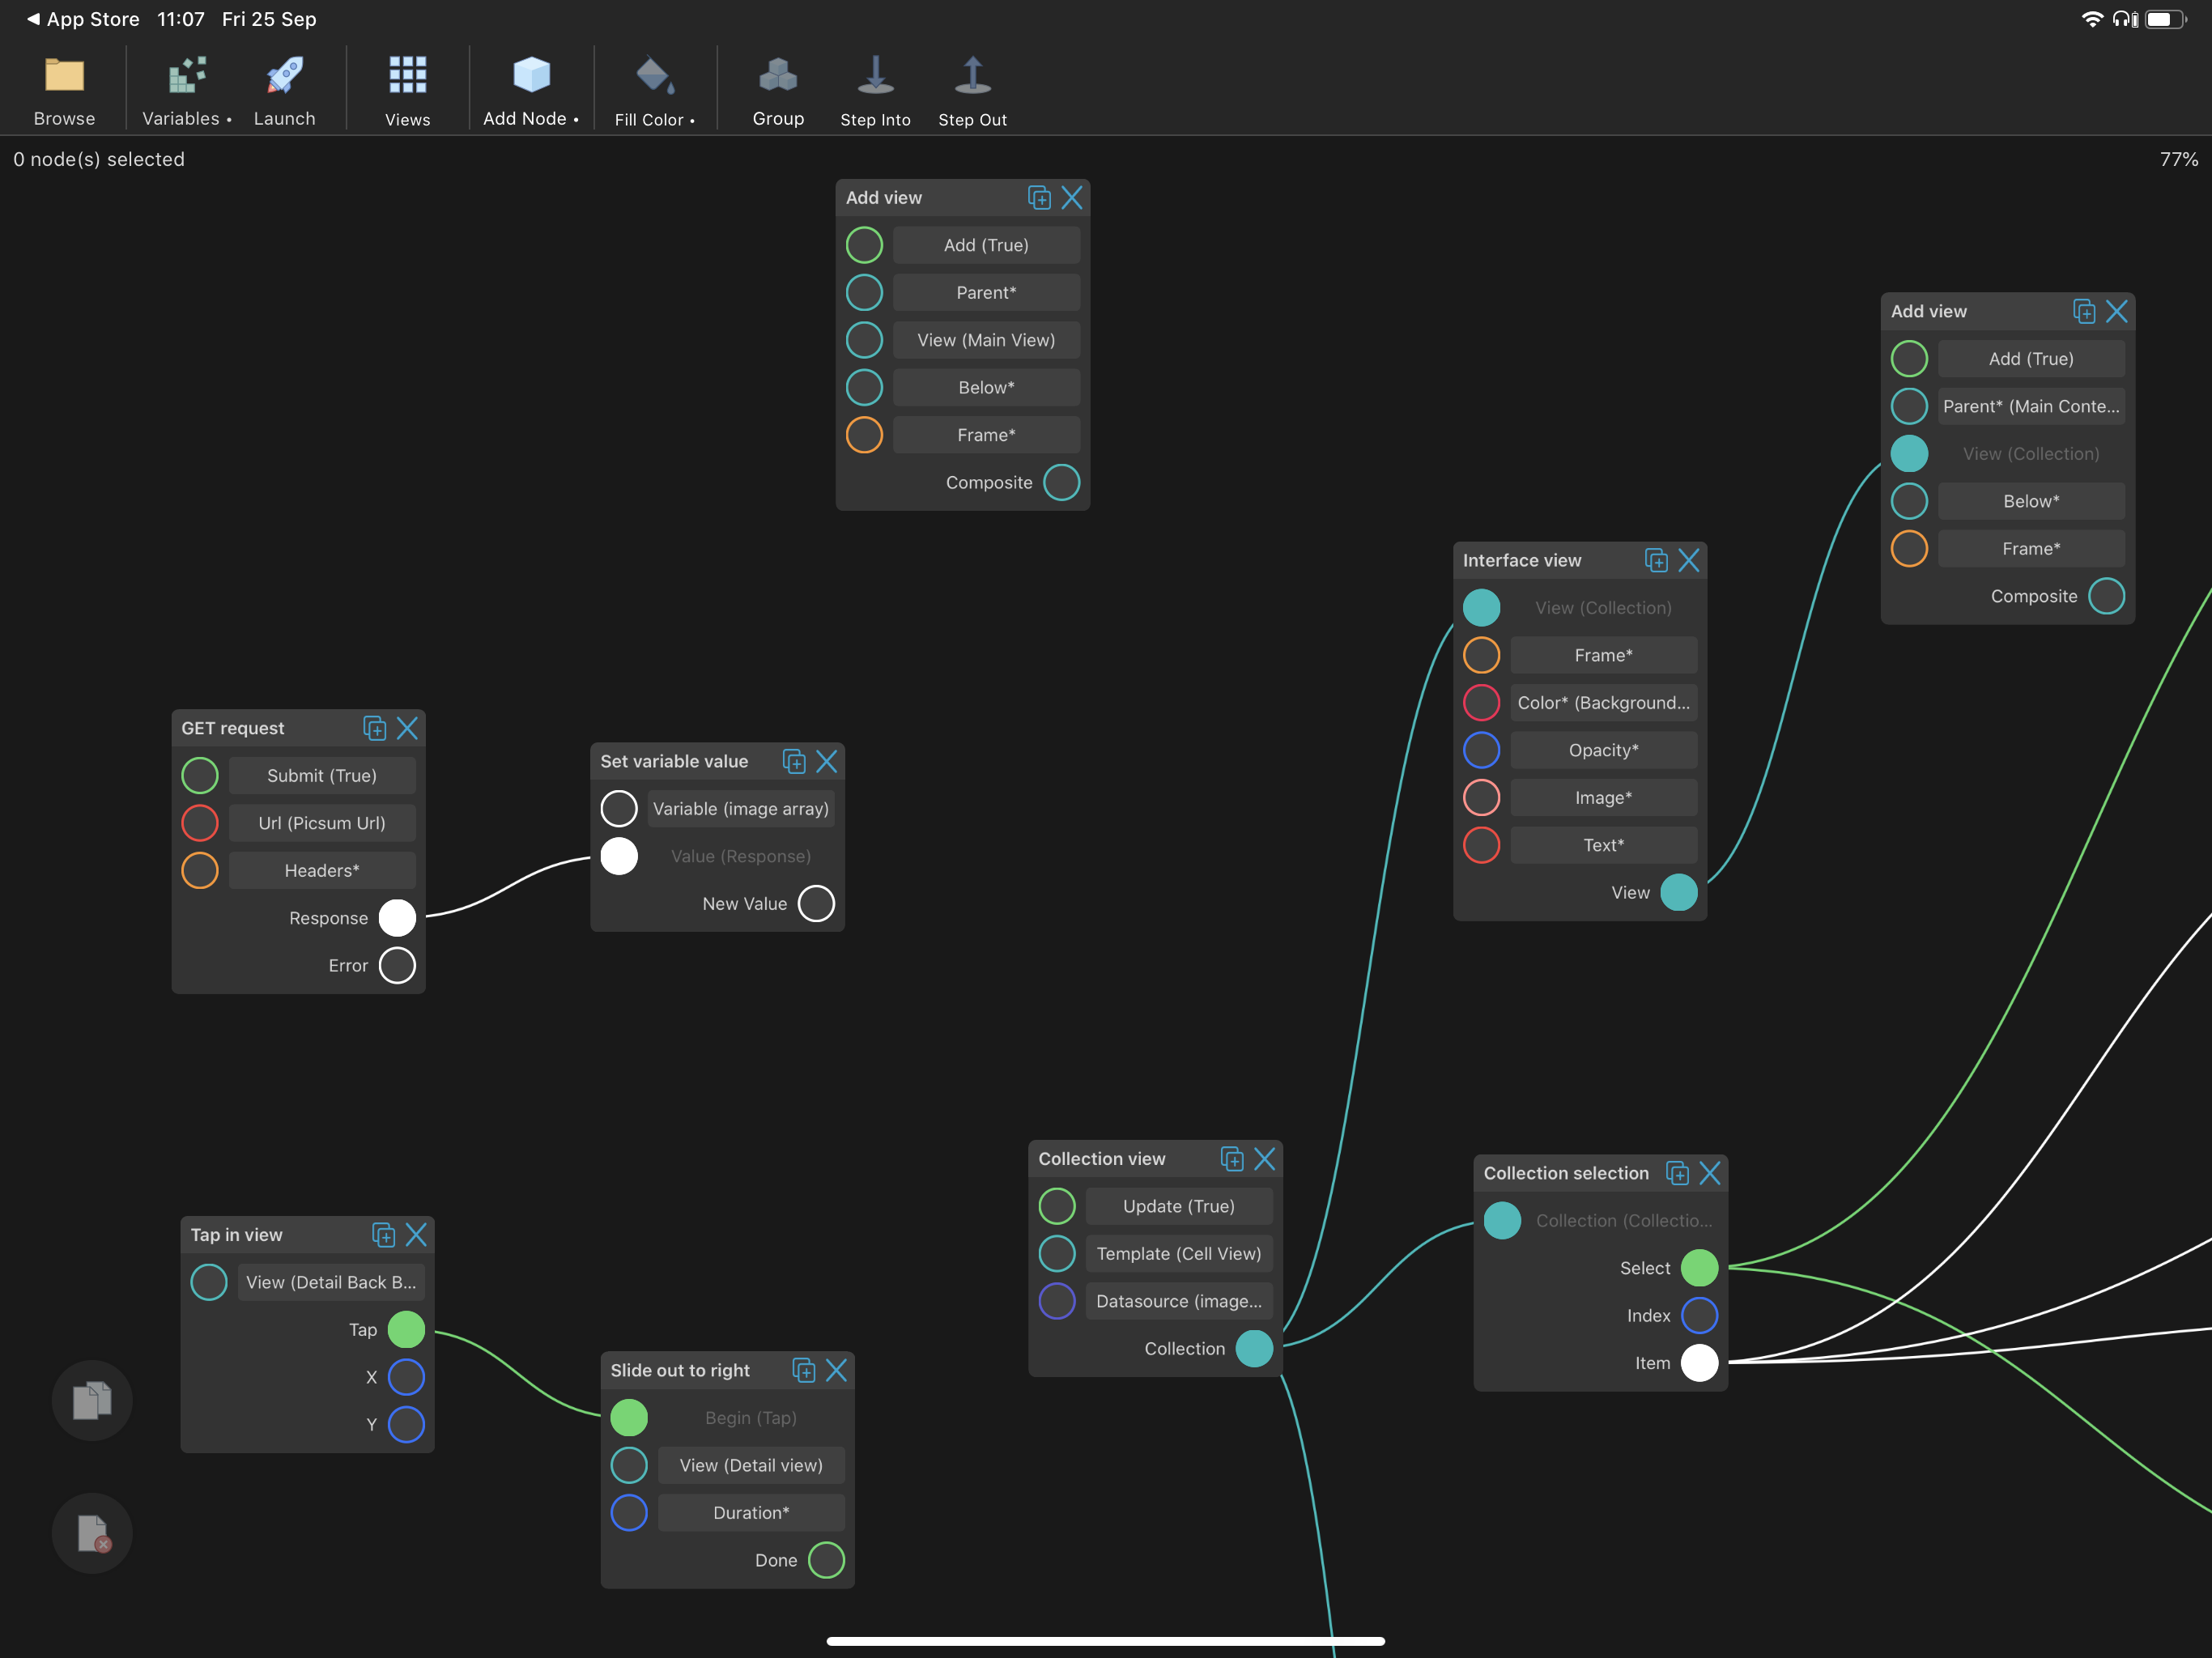
You can just as well pass along the response directly into the collection view node, but then the collection view will not be created until the response is received. This way, we are adding the collection view and covering the template view in the container immediately after launch. When the response is assigned to the variable, the collection view is automatically updated. In the mean-time, we set the background color of the collection view to match the container and add it on top.
Moving on, for each item we create a request to download an image for the URL contained in the “download_url” key:
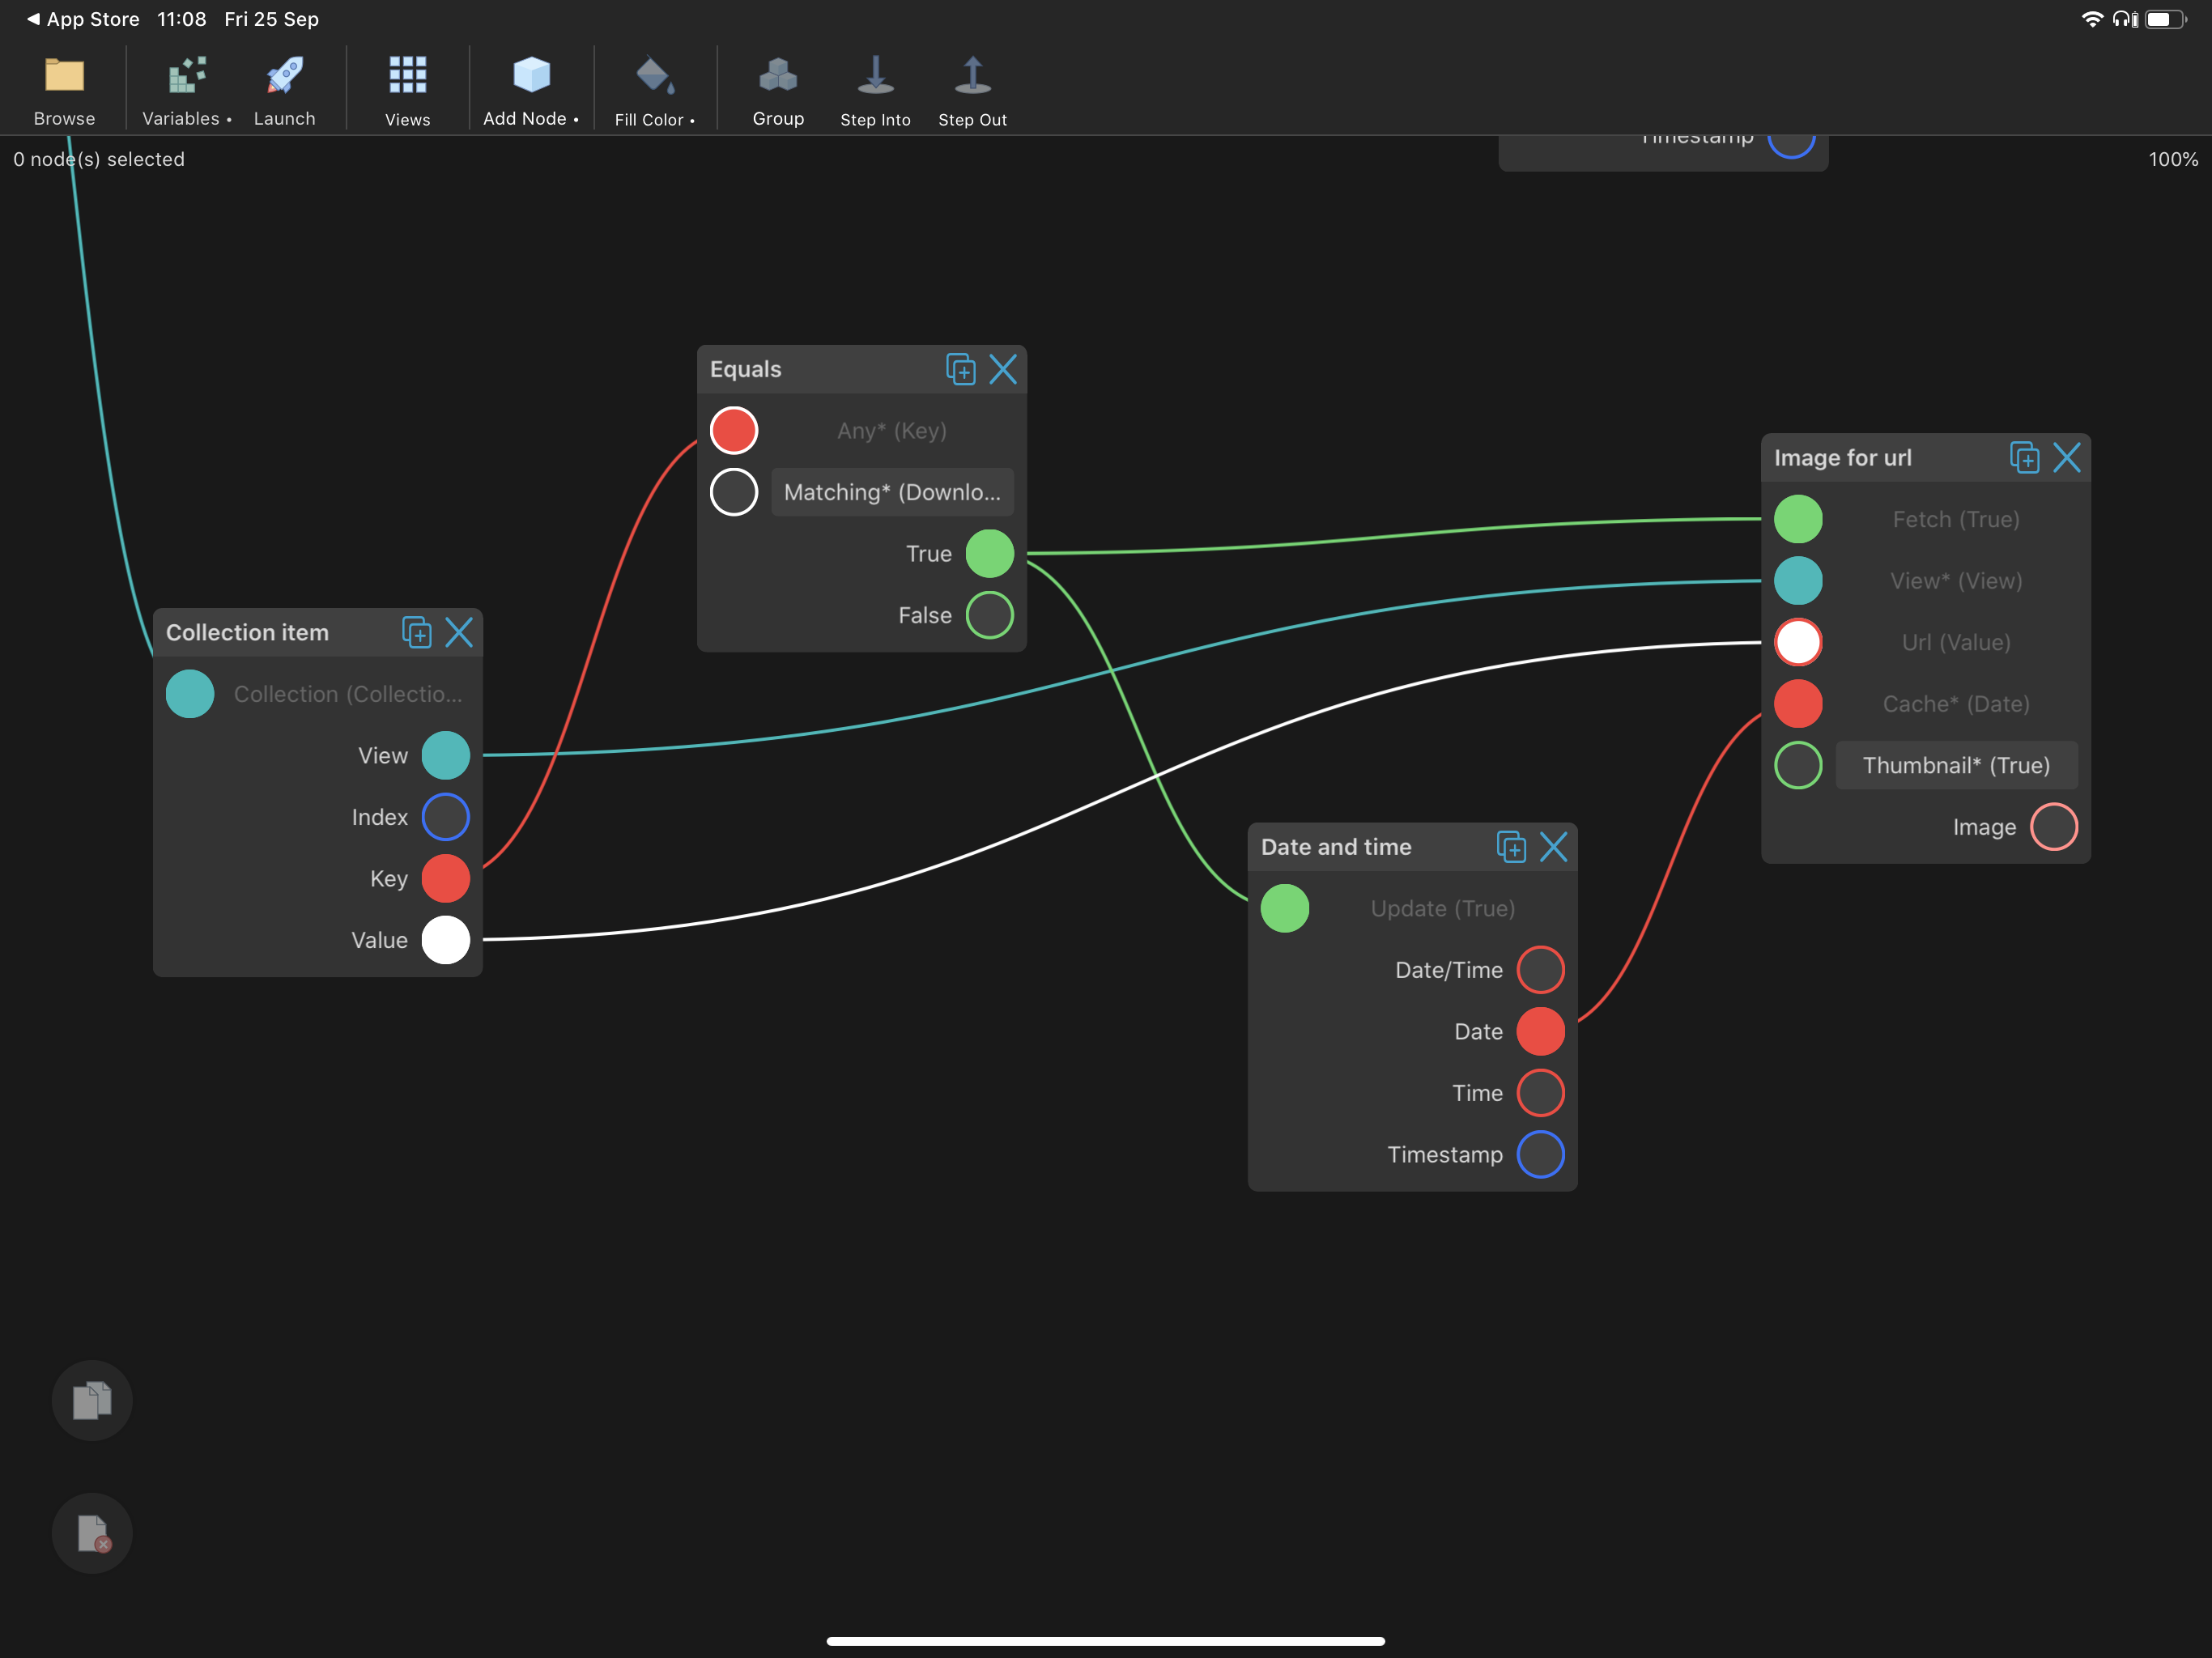
When using “Image for url” in a collection view, we should pass in the view from “Collection item” as well, since the asynchronous process must keep a reference to which view should be assigned the image when the request completes.
We have also added the node “Date and time” to get the current date and use as a suffix when caching the downloaded image. This means that images will be fetched from the server again the following day. Lastly, the inport “Thumbnail” has been set to true, so we automatically generate scaled down versions (matching the view size) of the image, cached along side the original image.
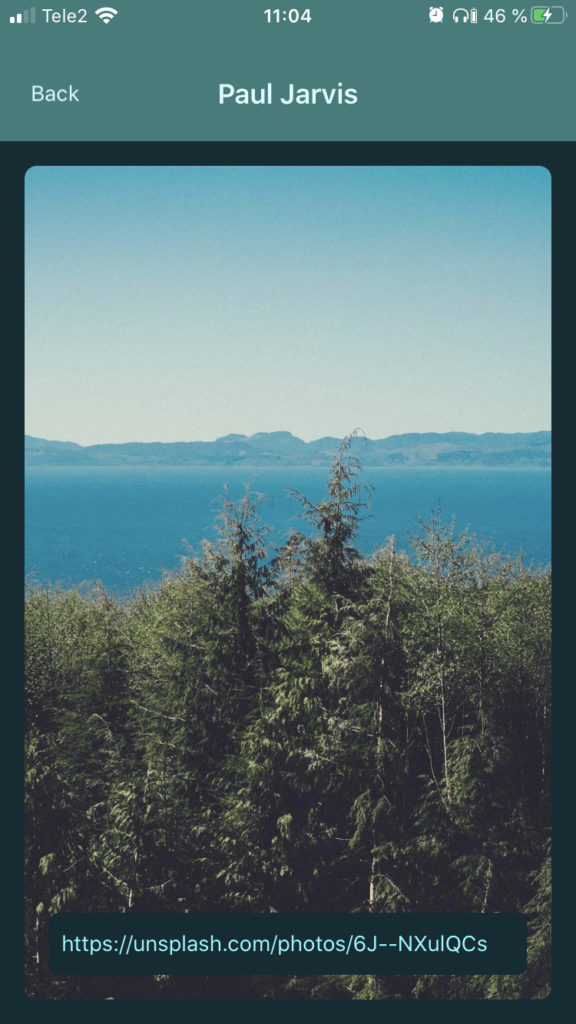
The final branch from the outport of the “Collection view” node is “Collection selection”, which is called whenever the user taps an item in the collection view:
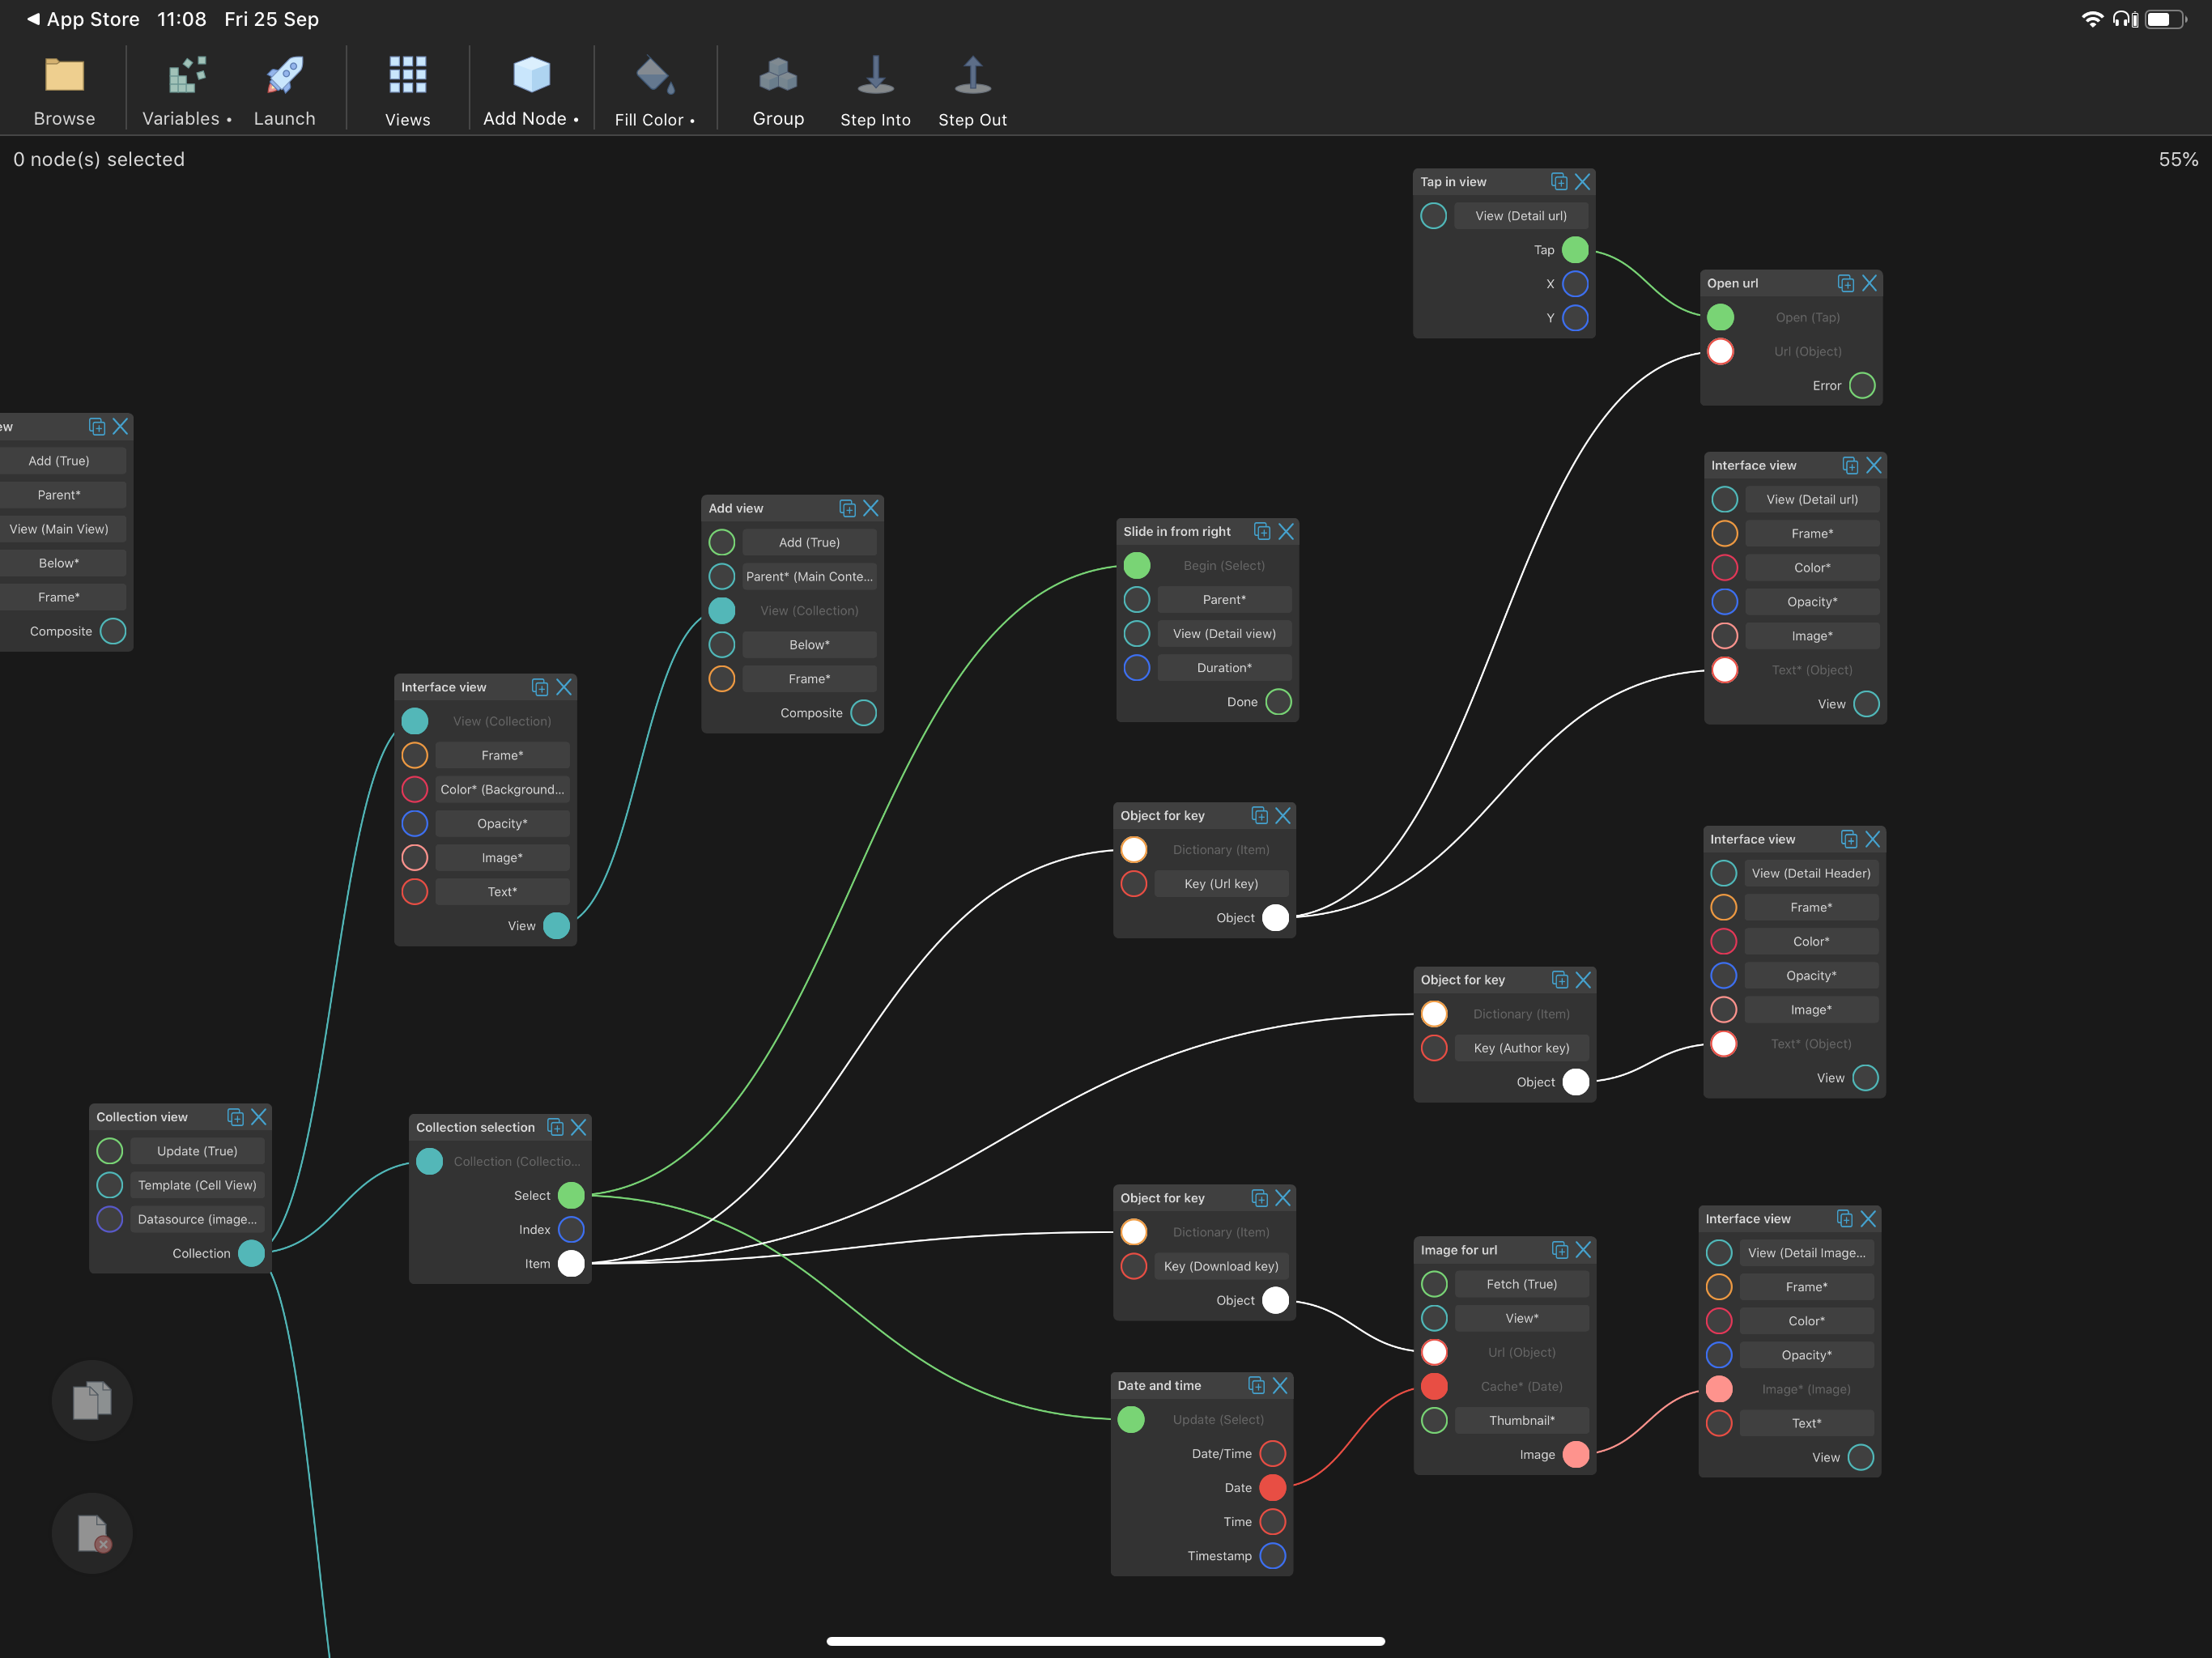
When we open the detail view, we want to show the full size image, so we have the same setup here with the node “Image for url”. The only difference is that “Thumbnail” is set to false. However, in our example, the original image was saved during the first request from the list, so it will just be loading from the file system.
You might have a data source with separate thumbnail and full size image urls, in which case you just would use a different key here.
If you want to poke around in this project, you can import and edit it (but not publish it) by clicking here.
Anyway, it’s a work in progress, so head over to the support page if you have any more questions. Good luck!
// Markus